Animating Interfaces with Core Animation: Part 2

This is the second in a series of posts I’m writing on animating iOS interfaces using Core Animation. In the previous post I created a planetary orbit demo using nested CALayer objects.
This time I’m going to show how you can dress up a UI by creating a simple effect using an image and Core Animation.
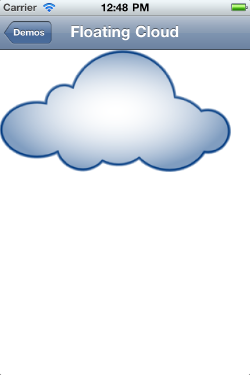
Floating Cloud sample
This sample is much simpler than the previous one, but shows how a simple animation can dress up an otherwise boring interface. Assume you have a login screen, or some other prompt that is similarly lifeless. If you want to give the user something appealing in the background view, a simple Core Animation can be quite effective.
For this demo, we’ll show a simple image of a cloud floating across the screen. Any other kind of image or transform can be applied, as well as multiple other animations. For simplicity sake I’ll only be showing a single sub-layer animating.
UIImage *cloudImage = [UIImage imageNamed:@"cloud.png"];

CALayer *cloud = [CALayer layer];
cloud.contents = (id)cloudImage.CGImage;
cloud.bounds = CGRectMake(0, 0, cloudImage.size.width, cloudImage.size.height);
cloud.position = CGPointMake(self.view.bounds.size.width / 2,
                             cloudImage.size.height / 2);
[self.view.layer addSublayer:cloud];
First in this example we’re loading an image, creating a new layer, and most importantly are setting the contents property of the new layer to the CGImage of the cloud. Sizing and positioning of the new layer happen next, after which we add it to our current view’s underlying layer. If you simply left it at that, you’d see a nice picture of a cloud in the background of your view.
CGPoint startPt = CGPointMake(self.view.bounds.size.width + cloud.bounds.size.width / 2,
                              cloud.position.y);
CGPoint endPt = CGPointMake(cloud.bounds.size.width / -2,
                            cloud.position.y);

CABasicAnimation *anim = [CABasicAnimation animationWithKeyPath:@"position"];
anim.timingFunction = [CAMediaTimingFunction functionWithName:kCAMediaTimingFunctionLinear];
anim.fromValue = [NSValue valueWithCGPoint:startPt];
anim.toValue = [NSValue valueWithCGPoint:endPt];
anim.repeatCount = HUGE_VALF;
anim.duration = 8.0;
[cloud addAnimation:anim forKey:@"position"];
Next we determine what starting and ending points we want the cloud to move from / to. The sizing in this example is relative to the size of the cloud image itself, meaning if you used a different image the code wouldn’t have to change.
After this we create our CABasicAnimation object, this time using the “position” keyPath, indicating that this animation will be operating on the position of the layer.
The rest of the code here is very similar to the previous example, but instead of assigning an NSNumber to the fromValue and toValue properties, we’re creating an NSValue object using its special constructors for handling CGPoint structs.
Again we specify a long animation duration and an infinite repeat count, and then we add the animation to our new layer.
Stay tuned for details on my other samples. For now, feel free to download the sample project and pick through the code yourself. And don’t forget to read the previous Orbiting Planets sample.